
Are you curious about the new trendy craft of diamond dotz? Why is it so popular nowadays?
Diamond dotz are resin stones that you stick on a color-coded adhesive canvas that has already been printed with a theme. The final result gives you a sparkly and three-dimensional effect.
The whole process of picking up little shiny diamonds and pasting them on canvas boosts your inner artistic confidence. It's also good for reducing stress and soothing the mind.
You can also call it an updated version of cross-stitch or embroidery with diamonds. In this article, we will go through the basics of diamond dotz and a few tips and tricks to help you get started.
What are Diamond Dotz Paintings?

Diamond dotz paintings are a new craft where you paint with the diamonds, not the real ones though. In this craft, you apply small, shiny resin stones on a color-coded adhesive canvas usually made of polyester fabric. The pattern is similar to something between paint by-numbers and cross-stitch.
What are the Benefits of Diamond Dotz Painting?
There are multiple benefits of using diamond dotz.
Here are a few benefits and reasons as to why you should start with the craft of diamond dotz right away after reading this article:
1. Better Cognitive and Motor Skills
Like needlework crafts, diamond dotz is an excellent hobby to feel calm while having fun.
When you pick one diamond with the pen tool and apply it to the canvas, it creates good hand and mind coordination, developing your motor and cognitive skills.
How?
Picking 2.5-millimeter tiny particles and applying them to the exact place on the canvas creates good hand-eye coordination. This way, your hand muscles keep flexing and become more skillful and adept.
Additionally, you practice meditation indirectly by doing long, monotonous movements which relax your muscles, normalize the heart rate, restore the nervous system, and reduce muscle tension.
2. Better Mental health
Diamond dotz is a type of MBAT, aka mindfulness-based art therapy. After a tough and stressful day, little shiny diamonds like resin help you relieve stress and anxiety.
According to the first-hand experience of diamond dotz fans, the craft can help their mental health in many ways. It reduces fatigue, tinnitus, insomnia, tension headaches and boosts concentration levels.
You can even buy a meditation art theme kit to get the best out of this relaxing hobby.
3. Great Hobby for Children
Kids can have fun and learn about patience and determination through the diamond dotz craft. The resin rhinestones need your full attention and also patience. The best one you can let your kid try is animal painting, such as kitties or birds or teddy bears & unicorns.
Along with patience, they can develop compassion for animals. Diamond dotz can also be tried out as a family hobby. All the members can get together and spend some quality family time.
4. Boost your artistic confidence
If you're someone who never tried painting or art because you think you're not good at it, then things are about to change. Diamond painting doesn't require you to be an art expert; it rather helps you stimulate creativity within you.
Your brain engages with the hemisphere, which boosts your artist's confidence, intuition, and imagination. With the immense range of easy to hard theme diamond kits, a nocive in the art can feel like a genius.
What's in the Diamond Art Kits?
Each diamond painting kit that you purchase comes with certain tools whenever you purchase a new diamond dotz kit. The kit includes:
- Canvas
- Diamond Dotz
- Stylus pen
- Drill tray
- Red wax
How Can You Get Started With Diamond Dotz Painting?
You’ve been intrigued by the new popular craft among art lovers yet are unsure where to start. No worries!
We have got you the answer. These are the few things you need to remember before purchasing your first kit and starting with the diamond painting.
Select the Theme.
The most important thing is to decide what you want to paint. The diamond art kits have different subjects and themes, such as animals, birds, landscapes, forests, people, etc.
Start the crafting with easier themes, such as flowers, and birds, and avoid buying the nature theme as it can be more complicated given the amount of subject it might contain from trees to the sky to other things.
They’re also not symmetrical, and you might create uneven results as a novice. Start with something easy and doable such as a flower or a kitten.
Select the Size.
For starters, a small canvas is your friend. You're trying it out the first time, and no one wants to spend so many hours on their first attempt at a new hobby.
You should take your time and learn things slowly; the smaller the canvas is, the faster you can complete it.
In case you want to spend some quality time, a bigger one can also do the job. With a bigger canvas, the process gets more interesting, and a bigger canvas allows more details to pop up.
Also, the perk of buying a bigger one is you can pull your hand-crafted art in your living room or hallway. The most used canvas by diamond art fans is 40X60 cm (15.5X23.5 in.)
Please remember that if you're getting a diamond art kit for kids, it should be small.
Choose the Diamond Dotz Shape.

The best thing about diamond dotz art is the multiple choices it gives you. Not only can you choose the painting you enjoy most, but you can also choose the shape of your diamonds.
Diamond Dotz comes in different colors, shapes, and sizes. We have 3D vs. 5D and round vs. square diamond drills to choose from.
As a beginner, you might be perplexed about which one to choose. After reading the comparison, you might be able to decide which one will suit you better.
Most people suggest that you should start with round diamond drills and ones you become expert, then upgrade to square ones.
Is that all It's? Picking the right shape of diamonds has to do with skills and ease of use; that's true, however, there is also an exception to this rule and that's your aesthetic appeal!
You need to choose a diamond shape based on what the finished product looks like. Round diamonds dotz lined up next to each other and left empty spaces on canvas.
It's fine if you're okay with such an uneven finished picture. However, if you can get irked by the fact that there is unused space on the canvas, then It's safe to say you should go with square dotz as they line up next to each other and leave no space!
Square dotz creates fuller, clear, and satisfying results. The square diamond dotz are maybe challenging for a beginner as this art is supposed to be relaxing; using a complicated shape dotz can make you annoyed, so it better start with the round ones.
Color
Apart from normal DMC color used in diamond dotz, a few ranges of color codes that come with diamond art projects are Metallics, Aurora Borealis, Glow-in-the-Dark, and Neon.
They're not as popular as DMC, yet you might find them interesting as they give extra shining effects. Yet, as a beginner you should go for DMC.
Choose the Drill: Full drill Vs Partial Drill Designs

As the name suggests, the full diamond dotz is the canvas fully covered with the dotz, meaning you have to apply dotz all over the canvas. As for the partial, the canvas comes partially adhesive and the only place where you have to apply dotz, which are the more centric points in the painting.
The purpose of creating partial drills is to highlight some area or part of the painting and then the rest. For beginners, there is no rule regarding full vs. partial drills; you can choose based on the design.
Painting with forests or sceneries has some focal point, so they usually come in partial drills. While the full rills create a more mosaic look and mostly come with square dotz or beads.
How Can you Do Diamond Dotz Painting?

As I mentioned before, diamond painting is one of the easiest and most relaxing crafts you can try. The process is straightforward. Here is a step-by-step process of how to do diamond dotz painting.
Step 1
Wash your hands and clean the space where you'll put your canvas. Take out your fabric canvas and lay it open on a flat surface.
Step 2
Take the drill tray out and pour your diamond dotz. The tray has a fridge line, so it'll land on its flat bottom when you give it a little shake. This way, it becomes easier because you have to pick the dotz from the round side, and the flat side will stick onto the canvas.
Step 3
On the canvas, you can see the color-coded chart on the right side. Follow it and see which number represents which color; choose any number and take out that diamond dotz bag from the kit.
For example, start with the letter repeated throughout the canvas. Let's say it's 'A.' Check the color-coded guide to see which number represents the 'A' color. Pull out that number of drills from your kit.
Step 4
Pull the film from the wax, and if your kit has a wax caddy, open it up and dip your stylus pen in it. The wax will get embedded into the pen itself.
Tip: You can pick 4 or more diamond dotz at once on the back side of the stylus. The wider the back side is, the more you can pick dotz at one time—this helps when you have an area with lots of the same color. Nonetheless, it's better to stick with the front side of the pen for more accuracy.
Step 5
Pick the dotz with the pen and place it on the A letter. Make sure you're not using any extra pressure to press the dotz on canvas. The good quality canvas has a good adhesive surface that immediately takes the dotz from the pen—no need to press it or make a mess.
Keep applying the dotz on all the As you find on canvas one by one.
Fact: Interestingly, the DMC code on the canvas matches the cross-stitch thread colors. You can photocopy the canvas along with the symbols and use its pattern for cross-stitching.
That is the same as cross-stitch threads because the number of codes corresponds with the colors of cross-stitch threads.
Step 6
- Start from the bottom side.
- Remove the film from one part.
- Keep pulling it upward as you work so it'll not get in your way and will be easier to work.
This way, the canvas will move upward instead of hanging from the table and coming into your lap.
You can work with one color at a time for convenience or multiple; it's totally up to you. Once you're done applying all the diamond dots on the canvas, holla, you'll have a beautiful dazzling piece of art that you can frame and hang in your living room and share the pictures with the diamond dotz club community.
Tips and Tricks For Beginners to Start Diamond Art
Here are a few tips about diamond dotz painting you need to remember as a beginner.
Keep the Canvas Covered.
Keep your wax caddy closed, or keep it covered with the film when you're not working. Similarly, keep the protective cover on the canvas while working or after working so that it doesn't get ruined by dirt or dry out.
Only remove a part of the film or protective cover from where you work. As soon as you complete a part of the canvas, cover it with protective film or roll something over so the design stays safe.
Flatten your Painting.
Your diamond painting canvas usually comes rolled up. More people keep it under a book overnight to keep it straight. However, you don't have to do that. This tip will help you straighten your painting in minutes.
Lift the cover or protective film from the adhesive surface and re-stick. There are four corners of the canvas.
Lay the canvas flat on a surface, then pull back the film from one side and re-stick it with light pressure. Repeat the process from all four sides, and that's how you get a flat canvas in minutes.
Get a Bead Storage.
Keeping diamond dotz in plastic bags, pouring it from the bag into the tray and back to the plastic back is too much. Get a storage box or bead organizer. The storage box will be the game changer for your diamond art journey.
Apply Washi tapes.
Use washi tapes around the edges of the canvas. The surface gets dirty or fuzzy if you leave it raw or open while working.
Use Checkboard Pattern.
While using square dotz, many users complain that they struggle to keep the line straight or even. For this, you can use the checkerboard pattern. Many fans try to trust this way to keep the line straight on the canvas.
Get the Blue Tack.
According to some fans, the wax that came with the diamond dotz kit mostly dried out after a few uses. So, instead of changing your wax, again and again, get a blue tack. The small lump of blue tack will last you forever.
Remove Air Bubbles.
Sometimes you keep applying dotz on the canvas, yet they won't stick to a certain space. This happens because air bubbles get created in that area, which hinders the dotz from sticking properly to the canvas.
A simple hack for this is to take a stationary blade and give the area where air bubbles are popping up a little slice. Don't cut through your canvas; a little slice will do the trick.
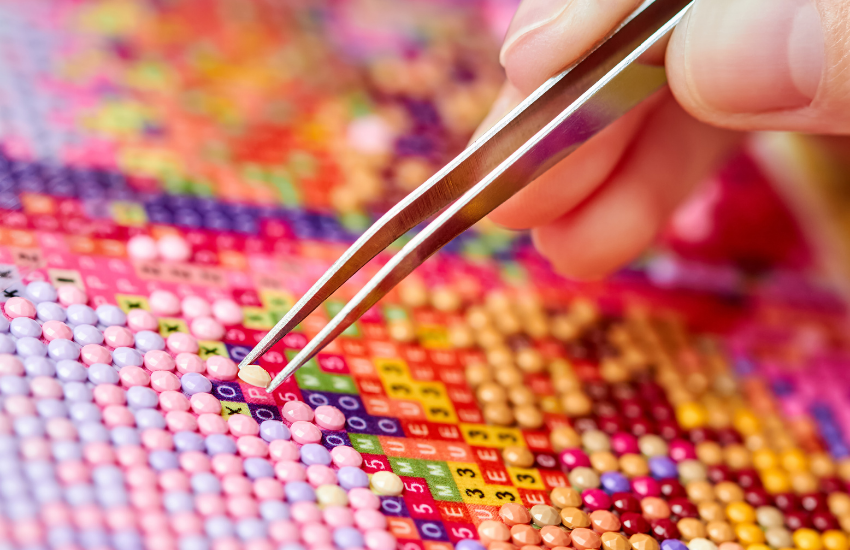
Use Tweezer for correcting your painting.
In case you misapply the diamond dotz in the wrong place or out of the symbol, take your pen tool or a tweezer to rearrange it in the right place.
These few tips can help you create visually spectacular diamond paintings.
Note: If you have children at home, you must be extra careful. Make sure the toddlers will not reach the dotz.
Kids from 3 years to above should be given access to do diamond painting under their eyes. The same goes for the pet as well. Toddlers and pets can swallow the diamond dotz, so make your you keep the diamond dotz out of their reach.
Wrapping Up
The diamond dotz art has become popular for a few years, and everyone seems to enjoy it a lot. With the increasing rate of mental health, you need to detach yourself from the screen and try out this amazing craft to keep your mind healthy while having fun.
Happy Diamond art work!